| ||
How to Run Disk Check in Windows 7
This will show you how to run Check Disk or chkdsk in Windows 7 to check a selected hard disk for file system errors and bad sectors on it.
Running
a check disk may take a bit depending on the size of the selected hard
disk. For faster and better results, do not use your computer while
check disk is checking for errors.
You will have a choice to scan only, scan for and attempt to fix errors, scan for and attempt recovery of bad sectors, or scan for and attempt to fix errors and recovery of bad sectors.
You will have a choice to scan only, scan for and attempt to fix errors, scan for and attempt recovery of bad sectors, or scan for and attempt to fix errors and recovery of bad sectors.
Solutions to Common Check Disk (chkdsk) Issues in Windows 7
OPTION ONE
To Run Chkdsk from Drive's Properties Page
1. Open the Start Menu and click on the Computer button on the right dark side.
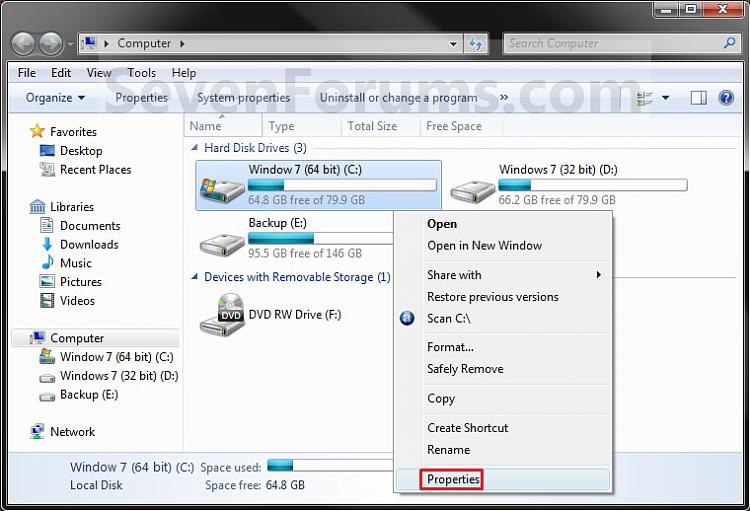
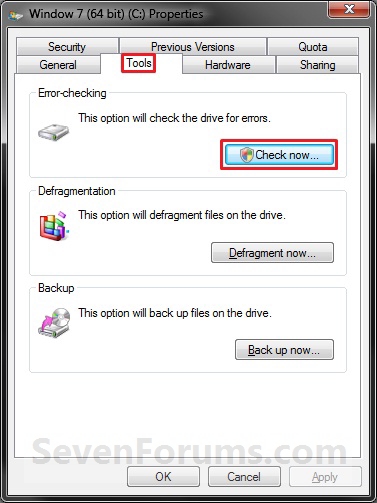
2. Right click the hard disk drive that you want to check, and click on Properties. (see screenshot below)3. Click on the Tools tab, and click on the Check now button under Error-checking. (see screenshot below)
4. You will now see this window. Do the steps below for what you would like to do. (see screenshot below)
5. To Only Scan the Drive for Errors
NOTE: This will just give you a report if there are any drive errors or not, and will not attempt to fix them.A) Leave both boxes unchecked and click on the Start button. (see screenshot below step 4)6. To Only Scan and Attempt Recovery of Bad Sectors
NOTE: This scan attempts to find and repair physical errors on the hard disk itself, and it can take much longer to complete.A) uncheck the Automatically fix file system errors box. (see screenshot below step 4)7. To Only Scan and Automatically Attempt to Fix Errors
B) Check the Scan for and attempt recovery of bad sectors box.
NOTE: This will automatically attempt to repair problems with files and folders that the scan detects.A) Check the Automatically fix file system errors box. (see screenshot below step 4)8. To Scan and Automatically Attempt to Fix Errors and Recover Bad Sectors
B) Uncheck the Scan for and attempt recovery of bad sectors box.
NOTE: This will scan for both file errors and physical errors (steps 6 and 7). It will then attempt to repair problems with files and folders, and recover physical errors.A) Check the Automatically fix file system errors box. (see screenshot below step 4)9. Click on the Start button, and do either step 10 or 11 below depending on if the drive is currently in use or not. (see screenshot below step 4)
B) Check the Scan for and attempt recovery of bad sectors box.
10. If the selected hard disk is not in use , then you will see check disk start checking the disk now. (see screenshot below)
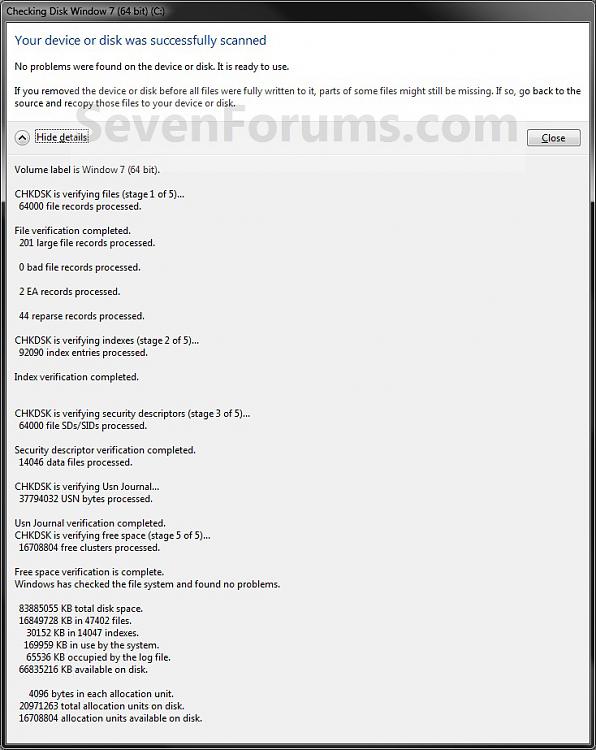
A) When the scan is complete, you will then see11. If the selected hard disk is in use, then click on the Schedule disk check button. (see screenshot below)
results similar to this. Click on Close. (see screenshots below)B) Click on OK. (see screenshot below step 3)
C) Stop, you're done.
NOTE: If the hard disk that you selected in step 2 is in use (for example, the C: drive or partition that contains Windows 7), you'll be prompted to reschedule the disk check for the next time you restart your computer. Otherwise you will not see this window below.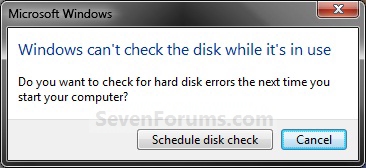
A) Restart the computer.
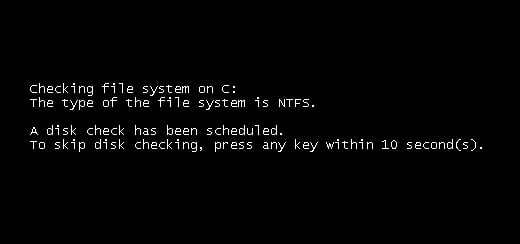
B) During startup, you will only have 10 seconds to press a key to cancel the Disk Check from steps 7 or 8. (see screenshot below)Warning
Once the Disk Check scan starts, DO NOT STOP the scan to prevent possible damage to the data on your hard drive.
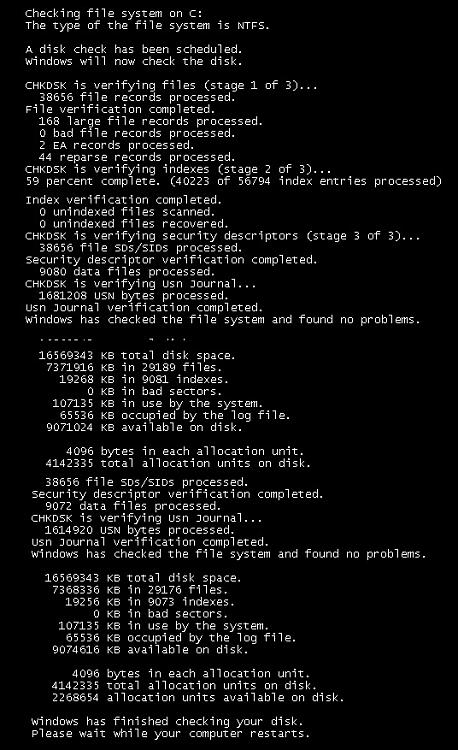
C) When the scan is complete you will see a report similar to this below briefly before the computer automatically restarts.




0 comments:
Post a Comment